Showing posts with label masculine. Show all posts

Friday, June 8, 2012

Guy Cards

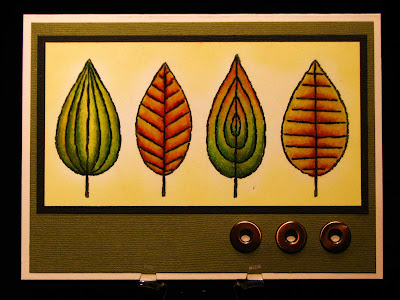
That was our challenge this week and I know it can be a challenge for most of us, me included! When it comes to guy cards I usually trend towards nature...leaves, trees, etc...but this time I thought I would stretch my stamps and look to use something that might not otherwise be considered a 'guy' image. Bring on Paula's porch swing by Stamping Bella.


I stamped it on bella's BESTEST paper and coloured it with copic markers pairing it up with Bo Bunny's Weekend Market Collection paper. Kind of a perfect match for a weekend lazing on a porch swing!

Now there was a method to my madness here because my brother turns 50 this summer and he is an electrical engineer by trade but a woodworker by night and made a beautiful swing that hangs from the porch of his century home so I thought this will make a perfect card for his birthday. I am also lucky enough to own one of his swings but sadly I don't have the deep porch to hang it from so for a while it hung on my back deck but now I'm looking for a stand so I can perch it in a shady part of my yard. I might have to commission him to make me one because I know exactly where I want it.

Next week is a sketch roundup, pic your fav from the sketches below and get crafty!


 Happy Stamping everyone!

Wednesday, May 16, 2012

Birds on a Wire

A little something different today...very Tim-like, very masculine, very artsy. I started with Stamping Bella's Journal your ART out THINKING BIRDS as my inspiration and stamped them with VersaMark ink onto some heavy weight smooth surface paper


Then using the tip of a small straw that I cut on an angle I picked up some Indian Corn embossing powder and carefully sprinkled just the heads of the birds, then I added detail black to the remainder of the bodies and tapped the paper from underneath to spread out the powder and cover all areas. The remaining powder was discarded onto a scrap piece of paper for later use.

Then I used a VersaMark pen/marker and inked over the birds again and repeated the process, except this time for the heads I used the discarded embossing powder from the first step, then added black detail again. I repeated this process one more time, and where I thought it needed it, I did it again. This is a closeup look. It almost looks enameled with the three layers of embossing powder. You can click on the image for a larger view....but trust me, it is A VERY COOL blend of black, bronze, with specs of white.

Once the embossed images were totally cooled and set, I sponged on distress inks....antique linen, rusty hinge, vintage photo and walnut stain. Using vintage photo I stamped the 'weeds' (a Tim Holtz stamp) in the background because I thought it looked too plain otherwise.

For the background piece I started with a piece of smooth ivory cardstock and again sponged on some antique linen, rusty hinge and vintage photo. Then I ran the piece thru my Vagabond with, yes, a Tim Holtz embossing folder and sponged on some walnut stain onto the raised portions of the result.

Because the embossed background was too wide for my focal image, I cut it and removed about a 1/4" then repieced it. The ribbon hides the seam...pretty brilliant eh! I do have good ideas sometimes!

Well, that is it about it....I mounted it up with a few layers and I think this is a PERFECT masculine card! If you are interested in more of my masculine cards, click on the 'masculine' label below, or the masculine label in my sidebar. I really do try to label my cards into categories, especially when I post Christmas or Masculine cards.

That's it! Pretty simple actually and it almost took me as long to write this post as it did to make the card! But don't tell the 'man' who eventally gets this card, let him think it took you/me HOURS to complete! We girls have to keep our secrets!

Linda.

Saturday, March 24, 2012

Birthday Cards Today

Hi everyone, today is my Mom's birthday and Dad celebrated his a couple days ago so I thought I'd share the birthday cards I made for them.

This set is called Sweet Violets from Flourishes. I bought it a while ago with Mom in mind and finally got to it. I coloured it with copics and pencils and paired it up with cosmo cricket paper. The frame for the flowers was created with a stamping up corner punch. I nice simple way to 'use up' empty corners. I know mom loves glitter, but this was so pretty on it's own I avoided the temptation.


Next up, Dad's card. We all know it is difficult to make those manly cards so if I can't find something to colour I turn to my stash of 'specialty papers'. These aren't your run of the mill scrapbook papers, many are either hand made, or have the look of hand made and of course my treasured Magenta Maruyama netting got on there. LOVE that stuff!


For this one I used peel off's and they look like nothing on the sheet when you buy them, but oh how exciting they become when you put them on paper because the combination of the polished and matte finish is something you can't get with regular heat embossing. (fyi...I used Cartiera Magnani 140lb cold pressed paper which surprisingly has a very fine texture for a cold pressed paper and takes to this technique very well).

Then I painted them in using a combination of tombow markers, sakura sparkle pens and US Artquest Stargazer's. FYI...all of these products were purchased at Pickle and with the exception of the magenta mesh I think they are all still around. Maybe we can get Kim to bring some of those FAB magenta papers back in stock {hint, hint}. Actually, I just popped over to their blog and OMG...such amazing things arriving that I think I'll have to swing by there this afternoon with my big wallet. I'm in need of some inspiration.

That's it for today, Happy Birthday Mom and Dad!
I'm off to get crafty.

Sunday, June 19, 2011

It's DAD's day!

How's everyone doing on this Sunday Father's Day morning? I've had my coffee, sat on the deck and before I get down to doing nothing I thought I'd pop in and show you the other Father's day card I made yesterday. Talk about last minute...but we have a mail strike going on so I knew it didn't have to get mailed by Wednesday to get there on time. This one is for my father in law, and you might remember THIS one I made a few weeks ago for my Dad. They are similar, but different and I LOVE them both!

This one again was inspired by Isabella's Eclectic stamps and LOTS of distress ink. As a side note, you should really check out Isabella's blog, she is uber talented with a very unique style that just draws me in. I was stalking her blog yesterday and in some ways this card was inspired by her.


The deets:
card size: A6 (4 5/8 x 6 1/4)
stamps (all stamping bella): eclectic #8 ticket, eclectic mini mesh, father definition, shady leaf
distress inks: forest moss, antique linen, old paper, vintage photo, frayed burlap
other: skeleton leaf (come on admit it, i know you have some!), leaf punches

That's it for today, I know I said I was gonna post a Mo but decided to honor the Dad's out there instead. Don't forget about our sketch challenge this Friday over at emily's blog...still LOTS of time to get in on it.

Friday, June 3, 2011

Guy Cards

That was our challenge this week, and I know for a LOT of you out there masculine cards can be a challenge and can make some folk actually cringe! I'm totally with ya! They are HARD TO DO, and a challenge at the best of times. If I had my dithers, I would colour flowers and whimsical little girls exclusively, but the truth is, guys like cards too! My Dad, Uncles, even my hubby, boys and nephews like getting cards that have that personal touch.

Now for the little gaffers, it is usually pretty easy...teens are the hardest but the second easiest of the bunch are those 'mature' men...dads, uncles, grandfathers. Although my Dad and Uncles love my colouring, my next fav thing to do for them is something that I call artsy fartsy with a twist of nature and this is what I created.


How'd I do it? I started on a piece of hot press watercolor paper which has a smoother texture than the more common cold press. Spritzed with some Adirondack color wash and then stamped with Isabelle's Eclectic #8 ticket background and eclectic mini mesh. Sponged the edges with distress inks and trimmed the edges with a gold Krylon Pen. To brighten up the colours I sprayed it with Krylon Matte Finish and then added some texture by spraying some Goosebumps...thanks Kim for telling me I 'needed' this product!

I used the Father Definition block on the tag. Actually I knew the entire definition would not fit into my cuttlebug cut and embossed die so I cut the tag first, then masked the right edge with a post it note and then stamped the definition so it would be 'contained' within the tag. Like who is gonna read the entire definition anyhow! Then I sponged with more distress ink to highlight those raised areas.

Since it was a 'mature' masculine card I had to pull in nature. Somehow maturity and nature seem to mesh for me! This is gonna be deep folks so don't laugh, but I think it has something to do with watching my yard mature and become more beautiful each year that I have that same appreciation of getting older and more mature...we become more beautiful as we age. So embrace those birthdays gals....I know I do!

Enough deepness...you are all probably gagging by now...so I'll get on with the final touch. I bought this SPECTACULAR set of Spellbinders leaf dies at my LSS the Paper Pickle...actually i bought ALL of the Donna Salazar line of dies....they are soooooo {ME}! LOVE these babies! And I pulled out my file folder of 'metalic' papers and came across a piece of glossy paper that I had inked up with some alcohol inks....this was so old I can't even remember the name of the technique! If I recall it, I'll let you know and give you all a tutorial link.

Well, that is pretty much all the details, and if you are are a local...this is a 'hint' of what's to come at my upcoming Pickle class! I hope I didn't give tooooo much away!

Next week our challenge will focus on PAPER PIECING! I KNOW you all love it, and if you've never tried it, now is the time. Create your masterpiece, send it to Emily by next Thursday and you just may win yourself some bella bucks. In the meantime, hop on over to Bloggabella and see what everyone else has come up with for their masculine card! I CANNOT wait to get inspired!

Later, Linda!

Monday, April 4, 2011

Happy Birthday Fella's

OMG...today my baby boys turn 21 years old and for as long as I can remember we called them fella's...as in "fella's, dinner is ready", or "fella's it's time to go"...it has always been "fellas" since the day they were born. I often wonder what our 'calling' would have been if we had girls, or a boy and a girl...but "fellas" has stuck till this day. I can't believe where the years have gone....does this mean I'm officially old? I'm not mentally ready to be old yet but some days my body tells me otherwise.

So in typical twin fashion, I have two cards to show you today and I'll start with Derek. This is a Mo Manning image that I purchased digitally. Mo is my definite go to gal when I need something for a guy and this fella's name is Paul typing, but in all honesty, it looks EXACTLY like Derek, right down to the bright blue laptop. We took a drive to Hamilton on Saturday and took Derek out to the Keg for dinner, which he was most appreciative of since he has been living on a student diet since September.

So here's to you Derek, happy 21st!


Next up is Alex, actually he was known as Baby A and made it to the finish line a whole 6 minutes ahead of Derek. In their early days, Alex was quite proud of the fact that he was 'first born'...but in my mind, they are totally equal. Alex enjoys the 'good life' and I think he takes after his mother a bit there! I asked him if he wanted to go to Hamilton for dinner on Saturday and he 'kinda' had plans! I can only imagine what those plans were so in my most  motherly fashion I gently reminded him of the dangers of binge drinking and then made hime a card that I hope will be a lasting reminder...here goes... this is the front of the card which is an Art Impressions image which was intended to be a root beer float! Well, I strategically omitted the straws and turned it into a mug of beer! Pretty clever eh!


I added some liquid applique for the 'foam' and over heated it to give it the caramel tinge and some deep drips of glossy accents gavr some dimension to the mug.

My cleverness did not end there however! The inside of my card was made with some quickutz dies as a gentle reinforcement to keep the drinking under control. Do I seem like a freak? Well maybe, but as much as I trust my boys to be responsible, it never hurts to gently remind them from time to time... and if they get a chuckle out of my reminder, I've scored twice! Reminder, AND a chuclke!

Happy Birtthday guys!...We love you.

Mom.

Tuesday, March 22, 2011

Happy Birthday Dad!

Today is my Dad's 77th Birthday! Happy Birthday Dad! He is slowly recovering from his bypass surgery and still feeling quite weak. His doctor is pleased with his progress but I think Dad thinks it should be quicker.

For his card I turned to nature and kept it very soft, very calming and tactile.


For the focal image I started out with a piece of white paper and spread on some pan pastels. VERY messy, I had pastels everywhere! Then I gave it a spray of some workable fixative to 'set' it and not get any more on my fingers. Then I stamped the Fred Mullett reverse fern with versamark and embossed it in black. The DP behind the leaf is an old piece of Magenta paper that I have been hoarding for years...but Dad is worthy so I cut into it. The green paper in the background is from Hanko Designs and a Japanese imported paper. Another one that I hoard because I only have a few pieces left. It looks good in the pic, but even yummier in your hot little hands because it looks and feels like grasscloth. Finally, the piece of mesh is also Magenta, I think they call it nest and it comes in several colours and several styles. This loose one is my fav. All of this paper comes out of a folder that I label 'specialty paper'...I only dive into it for special occasions!

Well that's it...hoping Dad has a wonderful Birthday.

Friday, August 6, 2010

Let the games begin!

The hunt for our new babe begins TODAY! Did you play along? Remember in order to be eligible to win the honoured place as the next Bellarific Babe you must
  • have a blog
  • be prepared to update it regularly
  • and participate in each of our challenges during the month of August using a Stamping Bella image

Now that the rulezzzz are out of the way, how 'bout a peek at my card for the Paper Piecing challenge. This is the Big Guy Grilling, a Mo Manning image available in rubber from Stamping Bella. I also used it's a girl thing, but replaced the girl with a guy cut out with one of my sizzix alphabet dies.

This card will be going to my brother...a bit of a belated b'day card since they were on a family European vacation last month and I figured that was a good excuse for me to be late with the card...his b'day was July 17th! And next weekend we have our annual family steak and lobster bbq where Paul will be taking COMPLETE charge of the grill. The timing is perfect I think!


Of course he was stamped on Bella's bestest paper, coloured with copic markers, and shaded with prismacolor pencils and gamsol. And just because I paper pieced his shirt, that doesn't mean it got off the hook for a bit of shading!!! Try it...it will give your paper pieced card an entirely new lift!

Don't forget to hop on over to Emily's blog later today because I'm fairly certain it will be OVERFLOWING with some FANTABULOUS cards!

And get that rubber and ink ready along with glitter and bling because that is our challenge next week....Razzle and Dazzle with Bling!!!!!!!

Finally, on a personal note, tomorrow I'll be heading to Novi with some local friends (including my new BLOGGING buddy Pauline!) and meeting up with Paulabella at the Heirloom Rubber stamp Festival! Last year you may recall I met the now infamous Kraftin' Kimmie...who knows who I may see this year....maybe Dave will be there!

Monday, March 22, 2010

Another Manly Card

Hello everyone! Happy Monday...okay...NOT! I do NOT like Mondays AT ALL and if my dream could come to reality and I could work a 4 day week I would NOT work Mondays. I just dread them. But I do have a Monday treat for ya today....a masculine card!


I've said it before...you KNOW you gotta make them...and as much as us girly girls would rather wallow in pink and yellow sometimes we gotta force ourselves to branch out. This card is going into my Mom's stash (she needs A LOT of cards for upcoming May b'days) and will eventually find a home with one of my uncles. He is a total sweetie and loves getting my cards as much any girly girl I know. Because of that, I always want to throw in just an extra bit of love when I make one that I know is going to him.

For this card I started with a Magenta Peel Off that I likely bought at Pickle. I say 'likely' because I have a LOT of them purchased at various places but I also know that many I have bought were from Pickle so I'm hoping that is where this one came from. These were three separate trees which I laid out on some smooth watercolor paper overlapping them. Then I carefully cut away the portions of trees that were 'underneath' another tree so they looked like one image. Then I roughly coloured on some Tombow markers (any watercolor based marker will do) and with a slightly wet paintbrush I blended the colors together. Once dry, I added just a bit of Sakura Gelly Roll pen in Forest Green Sparkle close to the branches and blended that out again with a wet brush. Careful with that Forest Green...a little goes a LONG way. This gave the trees some extra depth near the branches and an overall sparkle.

I did add some shading with marker around the trees but wasn't overly happy with the way it looked so went at the background with a sponge and a variety of pigment and/or chalk inks. Finally I got to the rustic manly look I was after. To finish it off I added a bit of pencil for grass. The paper is one that I have had FOREVER and I have another card to post later this week where I'll fess up a bit more on my past (and current) paper obsession.

That's it! Happy Monday to you all!

Thursday, January 15, 2009

Manly Card #2


Here is the second (and final for now) of the manly cards. My MOM totally gushed over this one when she got her hands on it.


No stamping on this one, I used Peel Off stickers. I think these might have been Magenta ones but I'm not sure. A while back I took a class at Pickle that was instructed by their Sakura rep. The techniques were centered around the use of Gelly Roll, Glaze and Souffle pens. On this card I stuck the Peel Off onto a smooth watercolor paper. Added a small amount of the Gelly Roll pen and then using a Koi watercolor brush, pulled out the ink. There is a LOT of pigment in these pens so a little goes a long way. The whole think has a nice subtle glitter and the Peel Off's have a shinny and matte appearance that plain old embossing powder won't give you. Finished it off with some Penny Black designer paper and large eyelets that were set with my crop-a-dile!

Enjoy!

Sunday, January 11, 2009

Finally...A Manly card

I know, I've promised this for about a week now and finally I'm getting to it. I have two to post, both I did quite a while ago and have had them buried in my stash. This first one is using a technique I learned while taking a class at Pickle...YES. I know, I teach there, but hey I can take classes too! Everyone has something they can share and I certainly don't pretend to know it all!.

So for this card, I stamped the main image in Walnut Distress Ink and then I picked up some embossing powder in my fingers and sprinkled it here and there...I didn't drown the entire image. When I shook off the excess I sort of turned the whole thing quickle upside down so EP wouldn't stick everywhere. Then, I stamped the distress background in Tea Dye (sorry...not sure who that image is from!). Finally I took some sponges and distress ink and added colour to the globe and distressed the edges.

Finished it off with a sentiment that was embossed and stamped with a Spellbinders label die and distressed those edges some more. There you have it! A very masculine card! This one will be going to one of my uncles and I'm sure he will love it!

Enjoy!
Linda.

Sunday, December 28, 2008

Anatomy of a Card

Hi everyone, this morning I was working on some cards for an upcoming pickle class and after getting a cutie magenta lion all mounted on this card I decided I didn't like it. So I carefully ripped it off and had this green background with giant eyelets left in front of me. After using three of those giant eyelets it seemed sinful to trash the entire thing. So I pulled out my JudiKins abstract leaves that I bought in Novi this past summer and set to work with my prismacolor pencils.


I didn't use gamsol on these, instead I put on thin layers of color with my pencils slowly adding colour until I had enough on there to be blendable. Then I blended the colours together with a blender pencil. When that was done, I coloured on top of the leaves with my VersaMarker and embossed in clear. Finally, I sponged on some Thatched Straw Versamagic around the edges, mounted it on a piece of black cardstock and onto the card it went.


Three giant eyelets salvaged and a good masculine card for my stash!

Monday, October 20, 2008

Sometimes I sits and thinks...

Sometimes I just sits.

That's been me for the last week. More appropriately, since my back has been out AGAIN, it should say "sometimes I lay...". Sitting has been uncomfortable to say the least! On top of that, I've been on call this week and that pager has been burning it's batteries out all week! Wednesday night till almost 1am, an early wakeup call on Friday, again on Saturday which sucked up a good part of my day and yet again this morning! Not to mention the darn thing went off the moment I stepped foot in the door after work! I hate when when work interferes with my life! Thankfully Kathy gets the pager tomorrow...sorry Kath...hopefully for your sake we have resolved EVERYTHING that could possibly go wrong and you will have a quiet week!

Anyhoo, in the midst of it all, last night I figured out that I could sit on the sofa and prop my thermophore heating pad between my back and my new feather throw pillows, open up the lid on my Harvest House supper table (looks like a coffee table, but the lid opens to become a table top!...awesome for small spaces) and manage to color! So I got this guy all coloured up.

A few weeks back Shannan Tuebner emailed me with a few River City sentiments she owns and that sparked me to check out their site since I hadn't been there in a while. To my surprise, they were having a 25% off sale on all unmounted stamps so I ordered a 'few'. I've always loved River City...they were one of my first fav companies when I started stamping 5 or 6 years ago.

This is one of my new ones, and I can't recall his name, but I like him! (unfortunately, he looks a bit washed out in the pic and I didn't bother to 'correct' it) Now, they are a bit of a challenge to color and I have to really be in the mood! They never look good stamped in black on white paper! so it always takes a few tries to get the right color combo of paper and ink. This guy was done on SU natural with Versafine smokey grey ink and I used Cornish Heritage Farms Fine Houndstooth Scrapblock behind him. I have also done them using SU night of navy on a darker carmel paper. AND I think that if you use a natural paper with some flecks with these stamps, it looks better for whatever reason!

The sentiment I'm pairing him with says "Sometimes I sits and thinks, sometimes I just sits".

I love him. And I have a different one colored up but I'm busy with class this week, not to mention massage, chiropractor, and a must needed hair appt so I can't promise I'll have her mounted in the next couple days. Speaking of classes, Pickle asked if we would do weekly classes for the next 8 weeks! I agreed, but that means I may need to slow down on blogging for a bit. Between that, the 'day' job, callouts, and getting my own xmas cards done I may not have too much time for new stuff! Be patient though...I'm not going far and will sneak in what I can. Let's hope the back holds out!

LinkWithin

Related Posts with Thumbnails